So you’ve ordered your custom printed Café Barriers. Now what?
All Banner Box cafe barrier systems are supplied for self-assembly and are suitable for indoor and outdoor use. You won’t need any tools to assemble the barriers, but we advise that 2 people work together to put install them.
Watch the video below or follow these 10 simple steps and you’ll see how easy they are to assemble and within a few minutes you’ll have it ready to go.
Make sure you have these instructions to hand! Download these instructions as a PDF and have them ready whenever you’re setting up, moving, or storing your café barriers.
The following list of parts and instructions are based on the Premium range of Banner Box Café Barriers with a double crossbar. The Popular range does not include a finial for the top of the posts and the weighted base is lighter.
Your Café Barrier system includes:
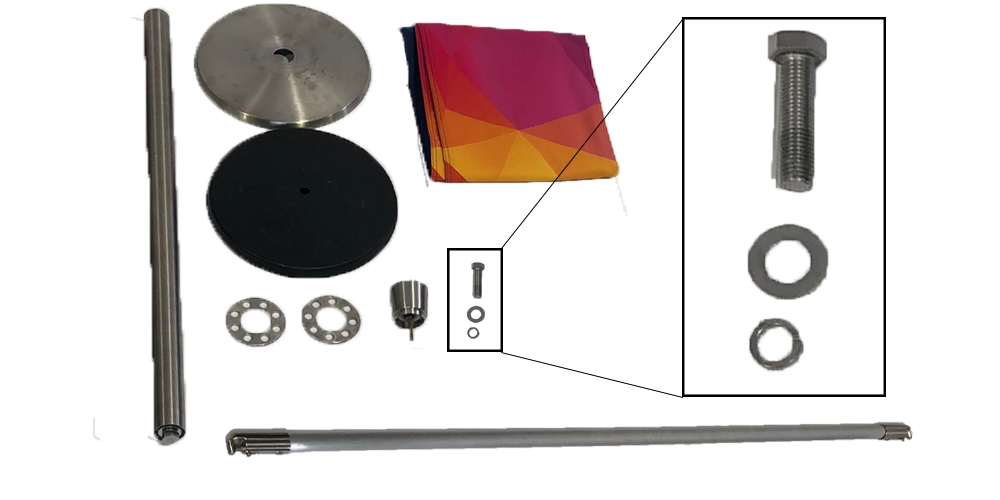
2 x weighted base (25kg)
2 x metal cover
2 x rounded washer
2 x flat washer
2 x base bolt
2 x steel post
2 x finial
2 x disc (small inner diameter)
2 x disc (large inner diameter)
2 x crossbar (width varies based on order)
1 x café barrier banner with pocket/s
A step-by-step guide to assemble your Café Barriers.
Step One: The Base
Place the rounded washer onto the base bolt.
Lift the weighted base and insert the bolt.
Lay the base back down, being careful not to trap your fingers. It’s heavy.
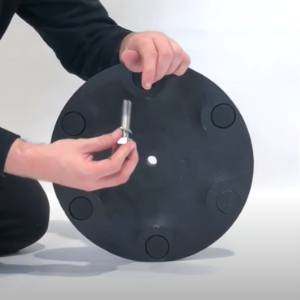
Step Two: The Cover
Place the flat washer onto the base bolt on top of the weighted base.
Lay the metal cover over the weighted base.
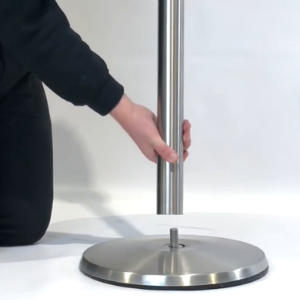
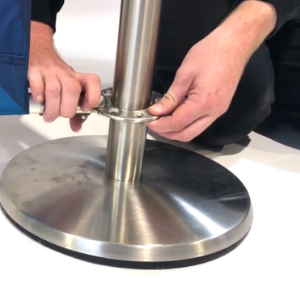
Step Three: The Post
Take the steel post and ensure the end with the wider screw space is aligned with the base bolt.
Screw the post in by hand until you feel resistance.
Step Four: Tight & Secure
Lift the weighted base and screw the bolt by hand to ensure it is tight with the steel post.
Lay the base back down and screw the post until tightened.

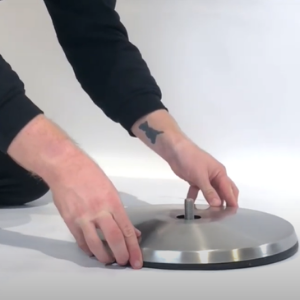
Step Five: Disc One
Take the disc with the widest inner diameter.
Place over the steel post and slide down to the bottom.
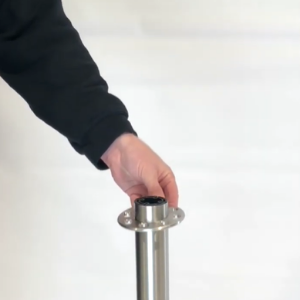
Step Six: Disc Two
Take the disc with the smaller inner diameter.
Place on top of the steel post and secure by attaching the finial.
Screw the finial by hand until you feel resistance.
Repeat Steps 1 to 6 for the second post.

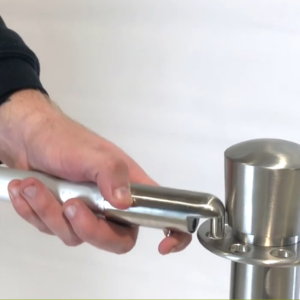
Step Seven: Crossbar
Align the two posts for the barrier system, with enough space for the crossbar width you’ve selected.
Use the dog clip to attach the crossbar to a hole in the top disc.
Adjust the placement of the posts accordingly.
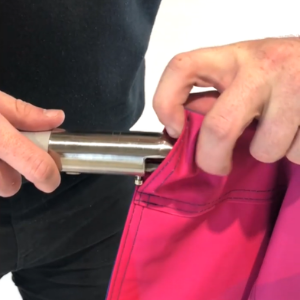
Step Eight: The Banner
Unclip the crossbar and feed through the top pocket in your café barrier banner.
When all the way through, clip both ends back onto the top discs.
Step Nine: Bottom Crossbar
Thread the bottom crossbar through the bottom barrier pocket.
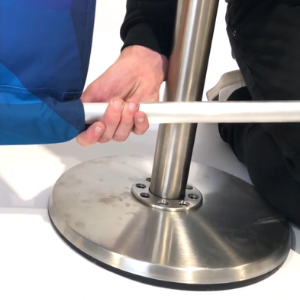
Step Ten: Final Attachment
Lift the bottom disc and clip the crossbar to the closest hole.
Slide the disc down as far as possible to create tension.
And that’s it! You’ve assembled your café barrier system.
If you’ve ordered more than one system, complete the steps for the number of additional posts and banners you have to set up, and move them to wherever you choose. You can adapt your café barrier set up to create your outdoor seating area, crowd control, or simple brand awareness outside your business.
Download these instructions and keep them handy to ensure your café barriers are built in a safe and secure way.
If you have any further questions about assembly or installation of your café barrier system, call our sales team on 01246 472 949 or get in touch with us here.
